Pages

Friday, June 7, 2013

See the Stars on a Shoestring Budget


As Science Club rolled around for February this year, I wanted something that would blow their minds.  Something different.  Something over the top. 

Hmmm…. Let’s study the stars!  And put the entire group in a giant, black inflatable bag…


It went so well, we did it for the entire 3rd grade during the last week of school!  Our music teacher kindly let us borrow her room!  It gets MUCH bigger!  We could stand up inside it!


Ok.  I’m losing some of you.  The StarLab was too expensive for our non-budget.  So, I picked up a huge roll of the thickest black plastic I could find at our neighborhood Ace Culpepper Hardware Store.  It cost me less than $30.  I’m a teacher in Georgia- I don’t know about all of the stereotypes, but we all have duck tape (yes, “duck” is the brand!).  Grabbed a pair of scissors and I was set.


I’m such a procrastinator that I actually made it in my living room (much too small) the morning of our meeting.  Hey, it worked out!

Step 1:  Fold the plastic in half.
Step 2:  Using the tape, seal the three open edges by folding the tape over the sides.
Step 3:  IMPORTANT!  Leave opposite corners open by not taking the tape all the way down the sides.  Leave about 3-4 feet with no tape. 


Step 4:  Grab a box fan and stick it in one of the open edges.  You want the hole to be pretty tight around the fan.  I usually place a chair near the fan, just to prevent it from blowing over as excited kids arrive.
Step 5:  Turn on the fan and wait about 3-4 minutes.  By holding the makeshift door (aka hole on the opposite side from the fan) closed, you can make the lab inflate higher. 


I split the group in half and was easily able to fit 25 kids inside at one time.

Once they get inside, now what?

I tried two different methods.  For the first, I printed some constellations and stapled them to black construction paper.  Then, I used a tack to punch holes where each star was, so that light could shine through the holes.  I grabbed an empty box and one of those old, ancient overhead projectors out of our media center’s closet.  Put the projector inside the box to block some of the light that shines from the bottom of the projector.  You want the box to be a bit larger, so the projector does not overheat.  Next, place the black construction paper on the projector to allow the light to shine through the holes aka stars.  My paper kept sliding off so one of my kids graciously allowed me to borrow his shoe, so you may want to bring in some type of paperweight.  Bring extra black paper to cover the area of the glass that is left uncovered when you put your constellations on it.  This sounds like a lot of work, but it really only took a few minutes.  I used a few of my students to help me punch the holes in the constellations during bus call one afternoon. 

My second method was easier, but far less effective.  I found a store bought star projector in our school’s science closet.  See an example here.  This was super easy, but because it projected dark spots for the stars, it was much more difficult to see.

I think that next time, I will try to grab a flood light, just so I don’t have to lug the projector all the way back to the media center.  Any way it goes, the kids walk into the room and see the bag inflating and they get super excited.  Goodness, I was just as excited to share the idea with them! 

Not only did they get to see the night sky, but I also showed them Magic School Bus Sees Stars, so they could “travel” to the stars!  Love Miss Frizzle!!

Good luck!


Tuesday, June 4, 2013

Identity Crises Leads to Ziploc Bag Ice Cream!

Man!  It has been a long time since I've posted!

School is out for summer.  The sun is shining and the pool is crystal clear and cool.  And I've been INSIDE trying to redo my blog.  Yep.  Stop and Smell the .... Children was catchy, but it wasn't a solid fit.  Every time I would come to write, it just didn't seem to sit well with me.

So I stopped writing, but now I'm back and with a clearer focus.  I love all things elementary.  Kids' books-got to have them.  Pictures of classrooms- a whole pinterest board.  Crayolas and Elmers- check!  But my heart always has beat to the drum of science.  So an elementary teaching blog with an emphasis on science!  I'm set!

This past year, I started a science club at my school.  We are a 2nd and 3rd grade school with about 450 students.  I was super excited to see 65 kids sign up.  My goal was to make the science hands-on and messy!  We met once a month and I was important for me that they be able to tell me the science reasoning behind whatever experiment, etc that we did before they got in their cars to go home.  We had a blast!

September - Box Turtles Visit the Classroom
October- What Did Your Owl Eat?
November- Field trip!  Recycling!
December- Electricity for the Christmas Tree
January- It Holds More?!?!  A Volume Tale
February- Homemade Star Lab
March- Plant a Garden, Watch it Grow
April- Ziploc Ice Cream

Which of these do I need right about now?  Ice Cream!


If you have never made ice cream in a ziploc bag, it is a must do!  So simple!

First of all,  kids are amazed that they don't need a machine to make ice cream!  Three ingredients, plus salt, plus ice!  Let's go!

Give each kid two ziploc bags (1 sandwich size and 1quart or gallon size)

Inside the small bag, put 1 tablespoon sugar, 1/2 cup milk, and 1/4 teaspoon vanilla.


Zip the bag up tight!  Put it inside of the larger bag.  Add 3 hand fulls of ice and about 1/3 cup of salt to the larger bag.  Zip it up!  Almost to yummy coldness!


Have the kids mash, mix, twirl, and poke their bags until they see that their liquid milk is looking kind of mushy.  Keep going!  This will take about 10 minutes or so and they are going to fuss that their fingers are soooo cold!  (Hmmmm.... science moment here!)


After my kids got their bags to a good, thicker than milkshake consistency, we pulled out the spoons and the chocolate syrup!  Yummy!

Now it's fun to make, tasty to eat, and interesting to learn how it froze.  I mean, we add milk to drinks all the time and they don't freeze.  Hmmm.....  Check out this youtube video to see ScienceOnTheBrain's experiment with melting ice and adding salt. 

The temperature of a melting ice cube will steadily increase to around 31 or 32 degrees Fahrenheit, give or take and then it will hang around that temperature for awhile.  Milk will not freeze at 32 degrees, so we add salt.  This brings the freezing point of the water down low enough for the thermal energy that is in the milk to flow out towards the freezing water.  Once enough of the thermal energy has left the milk recipe, it will freeze, making ice cream!


Super easy!  Super cheap!  Super yummy!

Try it this summer!  Now I'm off to sit by the pool and read my book (with a bag of ice cream)!


Wednesday, January 30, 2013

Magnets Experiments!


Just finished our magnets unit!  Check out some of our experiments and activities:
Most are quick and easy!


Horseshoe War!  We battle these horseshoe magnets to be sure students understand the difference between not attracting and repelling!  Like poles will repel-- Magnets and wood do not attract or repel!


How to Make a Temporary Magnet
See My earlier post for pictures, directions and teaching tips/tools for how to make a temporary magnet!


Trick Magnets
Head to your nearest Dollar Tree!
$1 for a set of these super cool trick magnets!  They amaze the kids when they attract through your hand.  Hide one on the back of your clipboard, and just start sliding it around.  Shh... as they notice the other magnet magically sliding around, they grin!


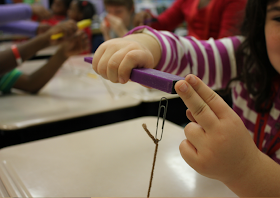
Floating Paperclip!
See this post for a super exciting, quick and very little work experiment on magnetic field!


Magnet Race
Review attract and repel by putting colored stickers on the poles of your magnets, so students can identify north and north and south and south.  Use one magnet to repel-without touching- the other magnet to the opposite side of the tray!  First one there is the Winner!  Get too close to the magnet's pair?  They will attract and you have to start over!  The race is on!  Place cards beside the tray that read "attract" and "repel" so the kiddos know to use these words as they are describing the experience!  They hardly know they are learning!


Floating magnets!
Don't have this display model?
Stick a pencil through several ceramic magnets with their like poles facing.  They float!  Students do a great job of explaining why this happens!  Review magnetic field by pulling the magnets away from each other?  Why do they no longer repel or attract?


Magnetic Field Models
Worth every penny!  Buy these!  I've tried pouring iron filings onto a glass picture frame--- What a mess!  These little kits are super easy for clean up and are safe for the kids to use themselves.  Hand them two magnets and have them describe how attract looks different from repel!  Why????


Compass!
Draw a map... you know some triangle mountains, snake like rivers and Christmas trees.  Slap a winding path through the middle and discuss what happens when a hiker gets lost.  How do you find your way out?  Why would a compass be helpful?  What does a magnet do to a compass?  What does a large iron object do to a compass?  How does it work?  Great activator!

Attract/Won't Attract Experiment 
Place various items in tubs and allow students to test them.  I always put different types of metals in mine!  It throws them off every time!  Especially the penny!  Try an aluminum can!
Recording sheet is FREE at my TpT store!

How to Make an Electromagnet:
materials- copper wire, nail, 9 volt battery
Coil the wire around the nail like this and hold the other end to the terminals of the battery.  It won't be very strong, but it will certainly attract a few spent staples- just enough to AMAZE the kids!


For me, experiments catch their attention, but they need the vocabulary in print!  Check out my word wall words, vocabulary matching sets, dominoes for vocabulary.


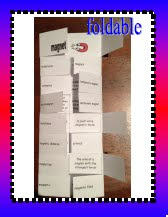
Vocabulary review with these awesome, kid friendly foldables (available at my TpT Store)

Check out my TpT store, Tab Purvis, for my vocabulary bundle, review game and most popular- magnets minibook!


Happy Experimenting!
Tab

Penguin Videos and Webcam!

Who likes penguins?  Me!!!  (and every kid in my class!)  We've been working on Mr. Popper's Penguins and the kids are beginning an informational writing piece this month.  I love that every ability level can find success with this topic.  One of my students impressed me after watching one of these clips when he asked if this was a rookery.  Rookery?!?  Awesome!  He's using the vocabulary from our unit!  So proud! 

These videos are short and sweet.  The content is appropriate for school and I've embedded the videos- so for all my not-so-tech-savy friends, you don't have to worry about crazy side banners popping up when you pull up youtube.  These videos are written into the page so you dont have to worry about surprises!

My kids loved these penguin videos!  They are produced by BBC and Discovery. 

Happy penguin watching!
Tab


Birth and March of the Emperor Penguins


Penguins launch like rockets from the water.


Emperor Penguin vs. Sea Leopard BBC


Emperor Penguins - The Greatest Wildlife Show on Earth - BBC
Penguin Webcam | SeaWorld San Diego

Sunday, January 27, 2013

Top FREE Apps for Elementary Science Teachers


Teach Science?  Want some cool interactive and FREE apps to use?  Check these out!  The last one is my latest discovery and I'm fascinated with it!  I can't wait until I teach animal adaptations for birds' beaks!  This will be perfect!


Dinosaur:  American Museum of Natural History

Take your class on a virtual fieldtrip to this museum!  See tons of dinosaur fossils and find out about their history.  Boys will surely become young paleontologists as they love digging through this collection.  My favorite:  Styracosaurus albertensis from Red Deer River region in Alberta, Canada, about 75 million years old! discovered in 1915. 
I had the opportunity last summer to visit the Natural History Museum for Children in London and was completely AMAZED to see real fossils!  This small town gal had never seen anything remotely like it.  It made me realize that if I hadn't, my kids certainly had not!  Since I can't pack them up and Miss Frizzle them up to Washington, D.C. from Georgia... this is the next best thing!


Google Earth

Wow!  Begin by seeing the entire world and zoom little by little all the way down to the front door of your school!  Crazy!  (Check out your own driveway, too!)  Super cool way to teach geography and scale!
I can stop trying to layer pictures of the United States, Georgia and our hometown into some -not so convincing graphic- production to try to get them to visualize the scale!  This is SO much better!


My newest fav!
Wildlab Bird
I've only used the preview mode and it is loaded with fancy options!  Begin by choosing your habitat- woodland, coastal, wetland or grassland and then select a structure style- such as:  owl-like, hawk-like, heron-like, etc.  Pictures of SOOOOO many birds pop up and you can even hear recordings of their calls and see their locations mapped out! 
My husband's a duck hunter and our little one year old girl walks around saying "duck" all the time!  She was just as amazed as I was with the sounds and pictures!  Quack, Quack!


Wednesday, January 23, 2013

Opportunity Costs

Opportunity costs!

I love this lesson!

Have the kids imagine they are in the checkout aisle of the store!
Ask them to remember a time that they were standing there and really wanted to buy something. What did they want?

How many times have they wanted to buy more than one thing?

Have the students discuss with their partner which two items would make their choice difficult.
They love this!! Thinking about candy and chips and coke and bubble gum!
Great Day!!!!

Use chart paper to document their opportunity costs. I always go first. Its funny, but EVERY year after we do this lesson, I have sweet little students bringing me my favorite candy! Yum! :) I love teaching!


Sunday, January 20, 2013

Should We Use TV Shows to Teach?

We must remember that this generation of children is growing up quite differently than we did.  They are driven by electronics in a way that we never will be.  I'm not saying I'm ready to shut up and show movies, but I do think that short, well chosen segments are certainly worth your time.

So I'm watching History Channel this afternoon because, yes, I am that big of a nerd. Have you ever seen How the States Got Their Shape? What a cool show for geography.
The website, History Channel: How the States Got Their Shapes, has full episodes and clips for many of the states.  Maine?  Nevada?  California?  All there!  Did you know that California drew their own state lines to include the gold filled Sierra Nevada Mountains?  Sure did!  Nevada was extended south to reach the Colorado River.  Smart move!  Most of the clips are less than 4 minutes long.  What a great way to bring in history, geography and technology!  Check it out.

I especially like their sly references to slavery, the transcontinental railroad and other features that fall in our social studies curriculum!

Tab

Saturday, January 19, 2013

Economics Picture Books for 3rd Grade

Want more bang for your buck?  Use these picture books as part of your reading and economics unit!  Some are short and sweet and can fill a transition time or short break, while others are lengthy and make a great lesson in itself! 

I love being able to share a book with the class.  Third graders love to have stories read to them.  Try these to help those kiddos make those economic connections that just aren't sinking in!
Happy Teaching!


The Great Fuzz Frenzy by Janet Stevens and Susan Stevens Crummel Scarcity
Check out my earlier blog The Great Fuzz Frenzy for teaching tips with this book!

Max’s Dragon Shirt by Rosemary Wells Wants/needs

Alexander Who Used to Be Rich Last Sunday by Judith Viorst Opportunity cost

Abuela’s Weave by Omar Castaneda Producers/Consumers

A New Coat for Anna by Harriet Ziefert Bartering

Snowflake Bentley by Jacqueline Briggs Martin Human resources

Boom Town by Sonia Levitin Entrepreneurs

The Berenstain Bears’ Dollars and Sense by Stan and Jan Berenstain Money/banking

The Magic School Bus at the Waterworks by Joanna Cole Natural Resources

Beatrice’s Goat by Page McBrier Saving

How the Second Grade Got $8,205.50 to Visit the Statue of Liberty
by Nathan Zimelman Profit
Click, Clack, Moo: Cows That Type by Doreen Cronin Strikes


My school library already had each of these books!  Great way to integrate your curriculum!

Sideline:  Check out my Economics Mega Bundle at Teachers Pay Teachers for vocabulary foldables, dominoes, word wall sets, reading sheets, performance activities, board games, file folder card games, lesson plans, anchor charts, parent involvement activities and more!

Tab


Wednesday, January 16, 2013

How to Put Together My Magnet Minibook!

So I've had several people ask...

Here's the trick for putting together the magnet minibook!

I hope the step by step pictures help you out. If not, leave me a comment and I'll get back with you ASAP.

For those who haven't seen my magnets minibook, it's available on my TpT store. It covers types of magnets, objects that are and are not attracted, magnetic and nonmagnetic metals, magnetic fields, electromagnets, and more!

The bag doubles as a keeper for your vocabulary cards! Pictures and artwork extend student understanding! 24 pages with space for students to include their own responses :)

Hope your kids love it as much as mine do!